Building a boombox from scratch 9.7.2019
My first kid turned 3 last week. As a young parent, and overly competitive person in general, I decided a normal gift wouldn’t suffice, and that I want to embark on an ambitious project of designing and building his own home-made, one-of-a-kind music player. I could just open one of my gadget-museum drawers and choose one of the many iPods, phones, or other toys that could easily fulfil the same task, but what’s the fun in that.
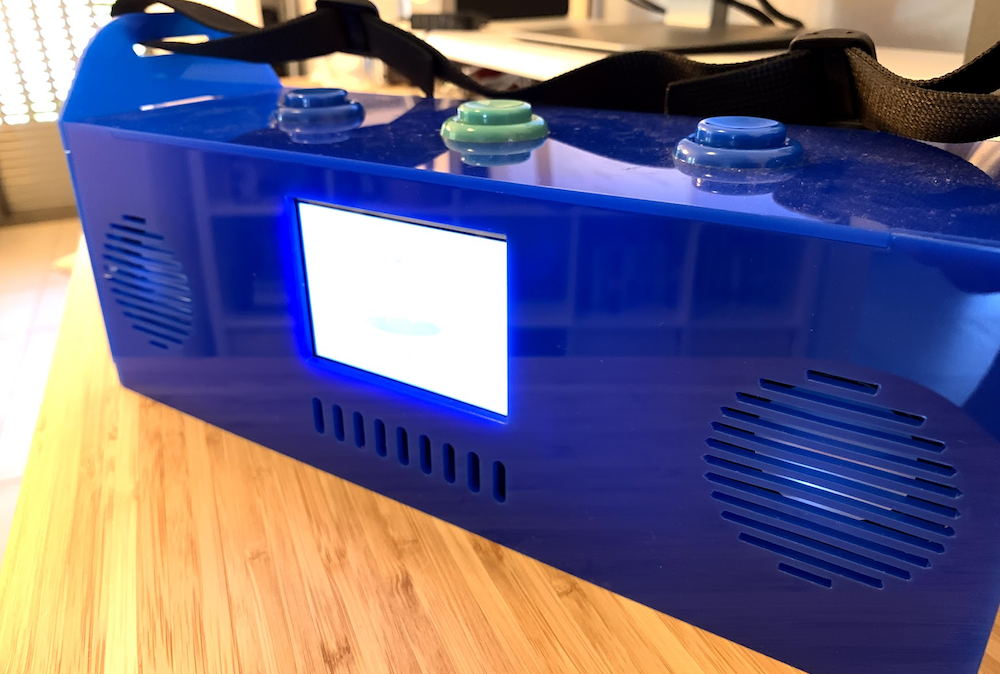 The final product
In this post I’ll try to describe the design process and share what I’ve learned along the way. I hope this will help others who want to build similar devices.
Starting out
I actually started by ordering a Raspberry Pi with a small screen. Shipping from China takes time, and even before I knew exactly what I needed, I figured I’ll eventually make use of these even if not for this project.
Then I started sketching some ideas. I established some design guidelines that helped me take decisions:
- It should be super easy and fun to use. No touch screens, no more than 3-4 buttons, simple display. More like the cassette players I grew up with than the latest Spotify update.
- I don’t have to make it compact. Not only spacious, big designs are easier to assemble and fit everything into, but also for my kid “bigger is better” is still a root belief.
- It should be easy to open up for maintenance. Stuff can and will go wrong and I want to be able to fix it quickly.
 Grew up in the 80s, so I've seen a boombox before
Hardware Design
The final sketch was a basically a 30x10x10 box, that contains the following components:
- A Raspberry Pi with a small connected TFT screen. Gets power from a micro-USB to USB cable. This specific Raspberry PI (3 Plus) has built in wifi which makes maintenance and updates easy.
- Speakers - I just bought cheap ones and extracted them from their original plastic shells. Some important features of the ones I bought are that they have a USB connection for power which goes into one of the Raspberry’s plugs, a 3.5mm plug that goes into the Raspberry’s line out jack, and an in-line volume control that I positioned in such a way that it’s still useable when inside the case.
- 3 Arcade buttons I had lying around forever as fidget toys. They are a pleasure to press, and would fit on top.
- USB gamepad - an organ donor. I replaced this pad’s original buttons by soldering the contacts of the arcade buttons to it’s touch points. It’s then connected by USB to the Raspberry. This was easier for me since I was able to test the buttons assembly with the software running on my laptop, and it also solved the issue of not being able to access the Raspberry GPIO due to the connected screen.
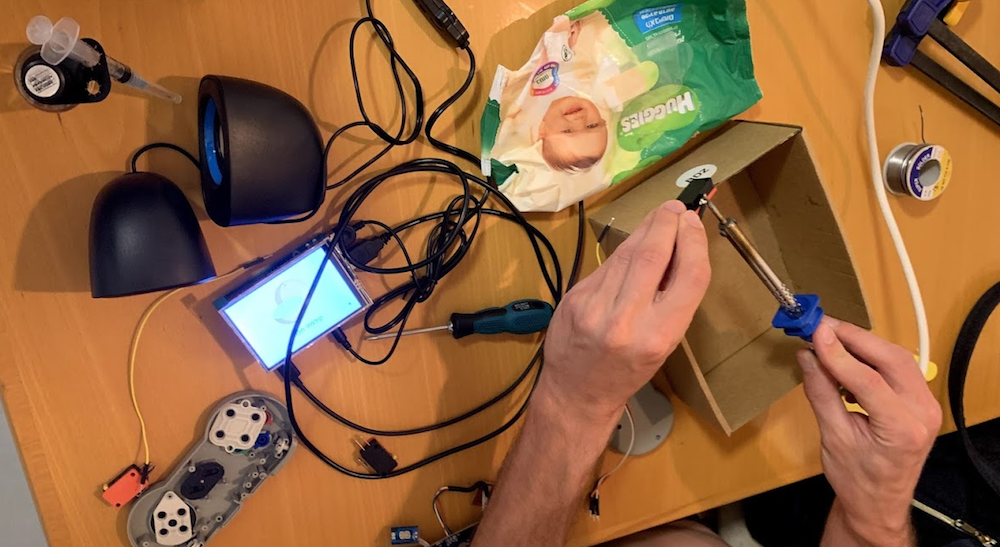 Connecting the innards
Setting up the Raspberry PI
To initially set up a Raspberry Pi you need to connect the microSD card to your computer and load it up with a Raspbian image (I used Etcher for that). I then also enabled SSH access and entered my home Wi-Fi credentials so I’ll be able to connect to it remotely without having to hook up a keyboard and a monitor. One more thing I had to do is to load the display drivers for the touchscreen I got. From that point I was able to start developing on my computer and quickly test everything on the Raspberry with the gamepad and speakers attached.
Software
I tried several approaches before settling on an easy solution - just having the Raspberry startup script launch a Chromium browser that would open a page from a local web server. The music player software itself is just a web page that shows the currently selected song and plays it. I used the Vue framework because that’s what I’m most productive with, but it’s certainly an overkill for such a simple project. HTML5 supports a gamepad API, which is pretty easy to use, so that simplified things even more.
I made a tracks.js file which exports an array of objects. Each object has a song file id, and the display name of the song. Whenever a track is selected, the app loads the song file id + .mp3 as the audio file, and the song file id + .svg as the displayed icon. The display name is displayed below the icon. Pressing one of the blue buttons loads the next or previous track, and pressing the middle green one plays or pauses the currently loaded track. I downloaded the tracks using youtube-dl, normalised the audio with Audacity (I used a “chain” for batch processing everything at once), and got the SVG icons from flaticon.com.
The page is served using a Python simpleHTTP local server. I added a script to the rc.local file on the Raspberry that after login starts the server and loads chromium in full screen mode. I built and tested everything on my main laptop first, and I can easily update the player over the air with scp whenever I want.
One more piece of software I use is jslisten, which allows setting up a command to be executed when a gamepad button combo is pressed. I use it for soft-shutting down the Raspberry when both blue buttons are pressed. You’re not supposed to just disconnect the Raspberry from power because it could corrupt the SD card, so that’s what it’s for.
Manufacturing
Once I had the basic design sketched and the software basics laid out, I considered a few ways to manufacture it. I thought about good old woodworking, but since I haven’t built anything like this before, I figured it would require a few attempts to get this right which would take too much time and will cause too much frustration. Then I thought about 3d printing. Turns out projects of this size are quite expensive. So the 2 or 3 attempts I envisioned would quickly deplete the budget.
Then I learned about laser cutting. Laser cutting is pretty simple - you choose a material (wood, paper, cardboard, plastic, metal, probably even marble), you provide a 2-dimensional drawing of lines to cut, and a powerful sci-fi laser just goes through the chosen material across the lines you’ve drawn. It’s quick, relatively cheap, and by gluing pieces together you can build very elaborate structures.
To create the drawings for laser-cutting, you can use a 2d vector program like Illustrator or Inkscape, or anything that outputs SVG, or you can use a CAD program like Fusion 360 to design the entire object and then extract the specific profiles you want to cut from that.
I eventually chose learning Fusion 360. The advantage of using a CAD program is that I was able to see how everything would fit, and to project components over the sketches for other components, which made it really easy for example to design the slot pattern that helped me attach the components together. I also modelled my components (buttons, speakers, computer) and made sure there’s enough room for everything.
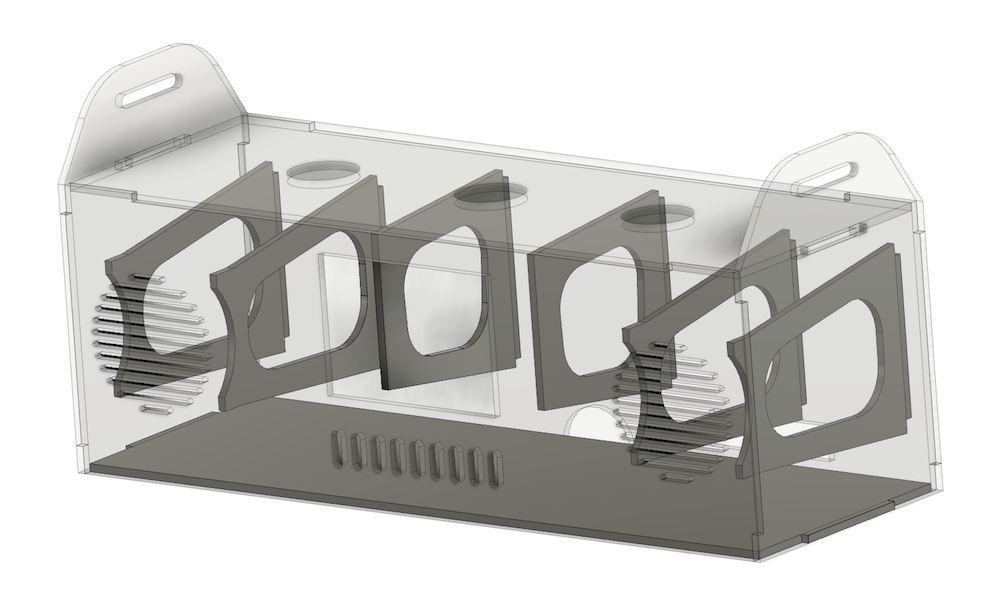 The model in Fusion 360
I used 3d modelling software in the past, but I’m just now learning Fusion so it took me some good 10 hours and about 4 attempts to build a model which isn’t completely messed up. I then extracted the profiles of the components to a different file and exported as DXF.
The design has 12 parts in total - 6 sides of the box, and 6 inner support parts (3 pairs) that would hold the raspberry and the two speakers in place. All the parts will be glued together, except for the front grill which is held in place by small hot-glued magnets.
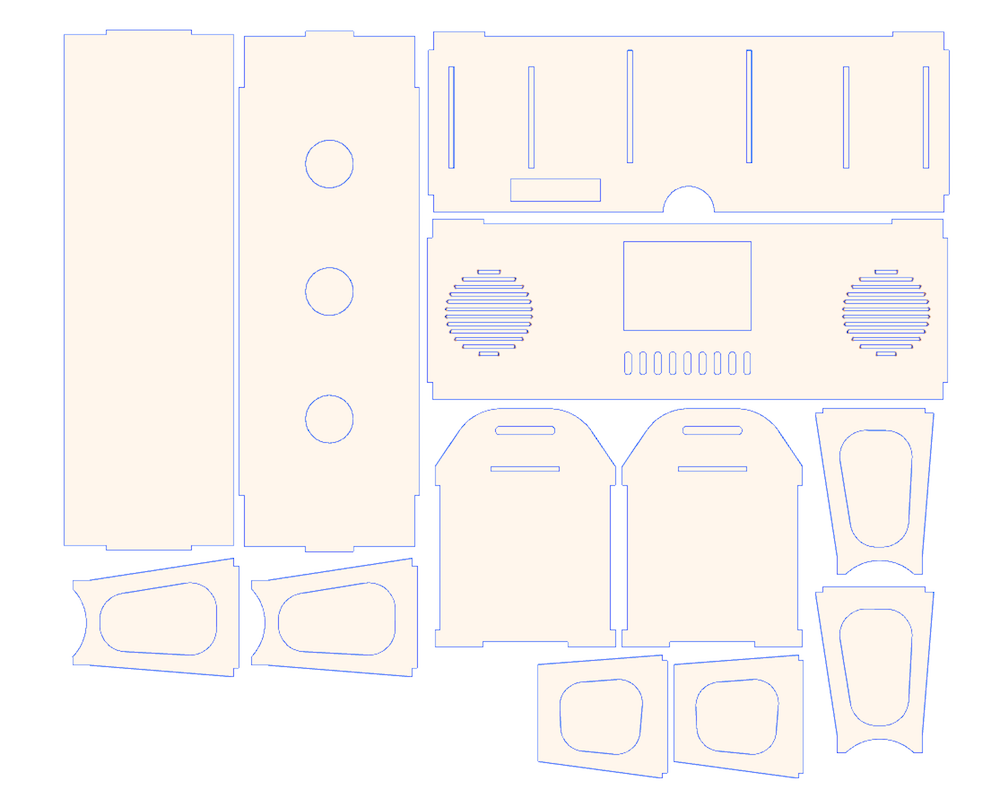 The export-ready DXF
Before actually cutting anything I tried planning the steps of assembly to make sure I’m not planning any parts that actually block other parts from being assembled. One thing I discovered in the process and had to redo is that I didn’t think about how the arcade button tightening nut would have fit in with the speaker supports already I place.
I did a first test cut with 3mm compressed cardboard, before doing the final cut with 3mm blue perspex. I tried to assemble everything and make sure I’m not wasting the more expensive perspex cut.
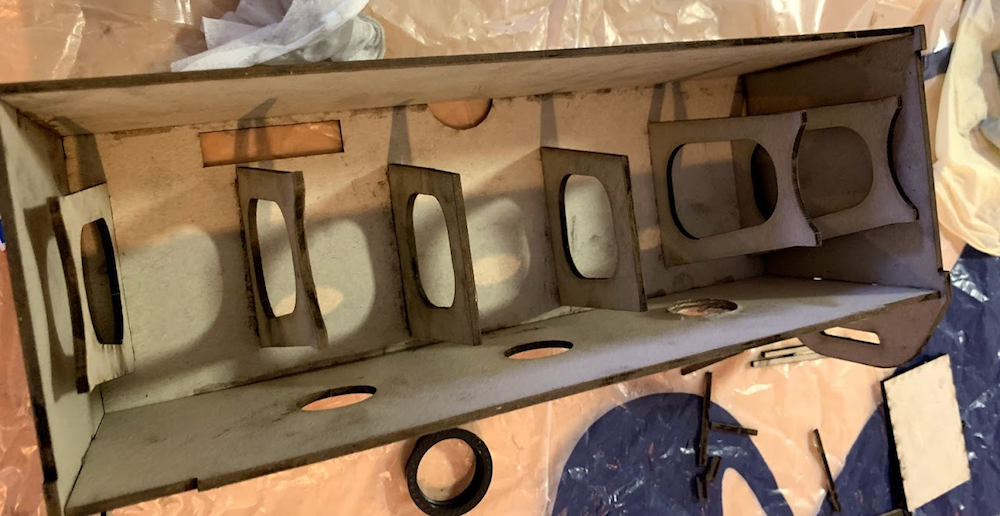 Cardboard test cut
One thing I discovered and fixed thanks to the test is that the holes I cut for the arcade buttons were too small. One thing I missed is that if I want parts to fit perfectly without being wobbly, I need to inset the slots by a bit - even about 0.1mm is enough. Cardboard is very consistent in thickness, so 3mm is 3mm as it should be. Perspex is a bit less accurate, and in some parts of the material it could be even 2.85mm. It’s elastic enough that it’s safe to assume it’s just 2.85mm. The parts did end up connecting to each other, but they were a bit loose and it was hard to get them to stick in the correct 90 degree orientation. Ideally I would have discovered this early with a more expensive perspex test.
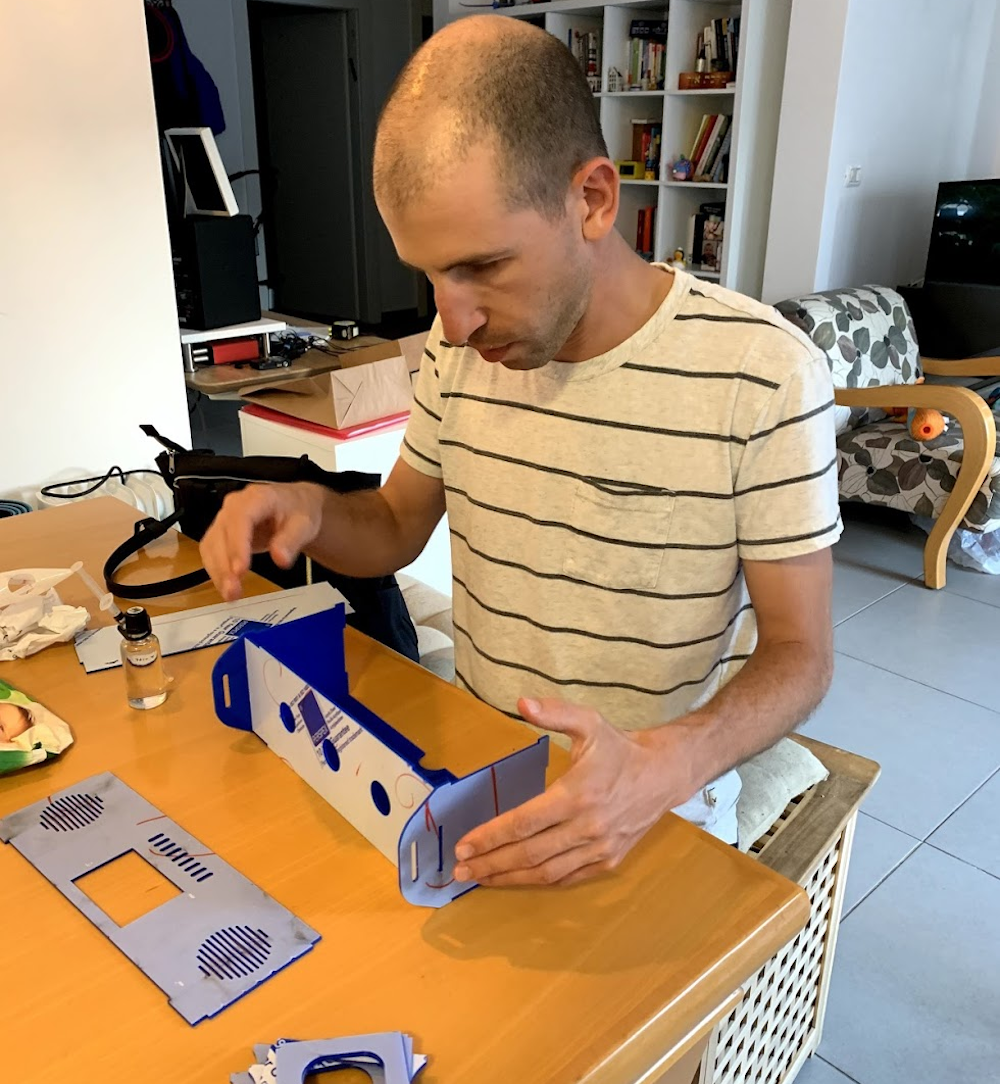
Assembly
That went surprisingly smooth! I encountered just a few surprises. First, I used chloroform to attach the perspex parts together. As mentioned, it was much harder to hold the parts in place than it was with the cardboard test. I had to be really careful and make sure the chloroform did it’s job before moving on to the next part. The second issue was that hot glue isn’t that good in holding heavier parts together. It was really hard to get the Raspberry to stay in place. In the end I just improvised and secured the Raspberry with a good old zip tie. It’s actually a good solution I’m happy with for the longer term. If I thought about this early I would’ve also designed special holes to mount the zip ties through.
Another issue that came up is that the micro-usb raspberry power connection had to be flexed in a sharp angle in order to fit in. I cut a small part of the flex limiter to allow for easier bending.
I used small magnets hot glued to the front panel and the side panel to hold the panel in place and allow easy opening for maintenance. It actually holds pretty well even without the magnets, but they are a good addition.
The carrying handle is a simple 2.5cm strap tightened by standard plastic buckles. Simple and does the job.
One cool side effect I did not plan for is that the large box behaves as a really nice acoustic chamber. The cheap speakers actually sound really good when the front panel is in place.
 Using chloroform to glue the perspex components
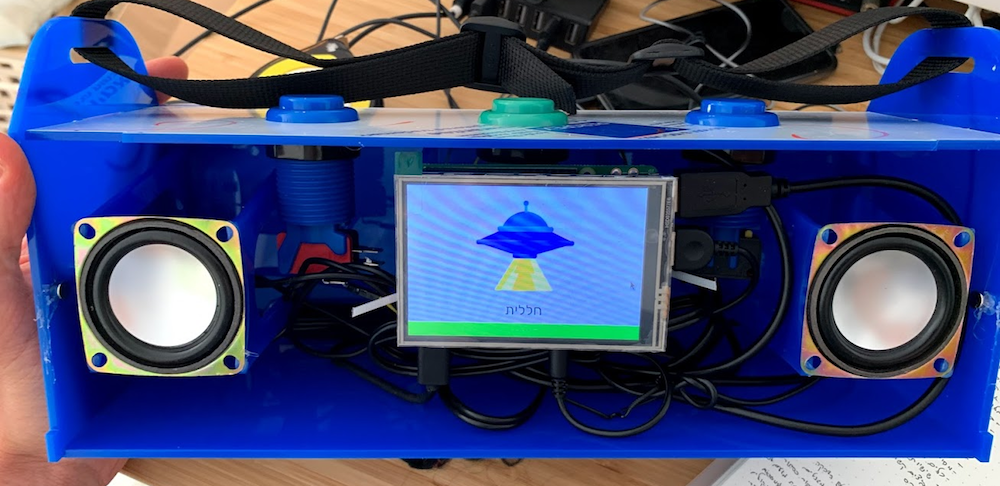 How it all looks in place
Final Thoughts
I’m really happy with how this turned out. I learned quite a lot, and customer #1 loves it. I was considering making the interface a bit more powerful (shuffle button, soft-volume, and so on), but I think it’s just the right amount for a 3-year old. He’s able to intuitively use it the way I designed - identifying and choosing songs by their icons.
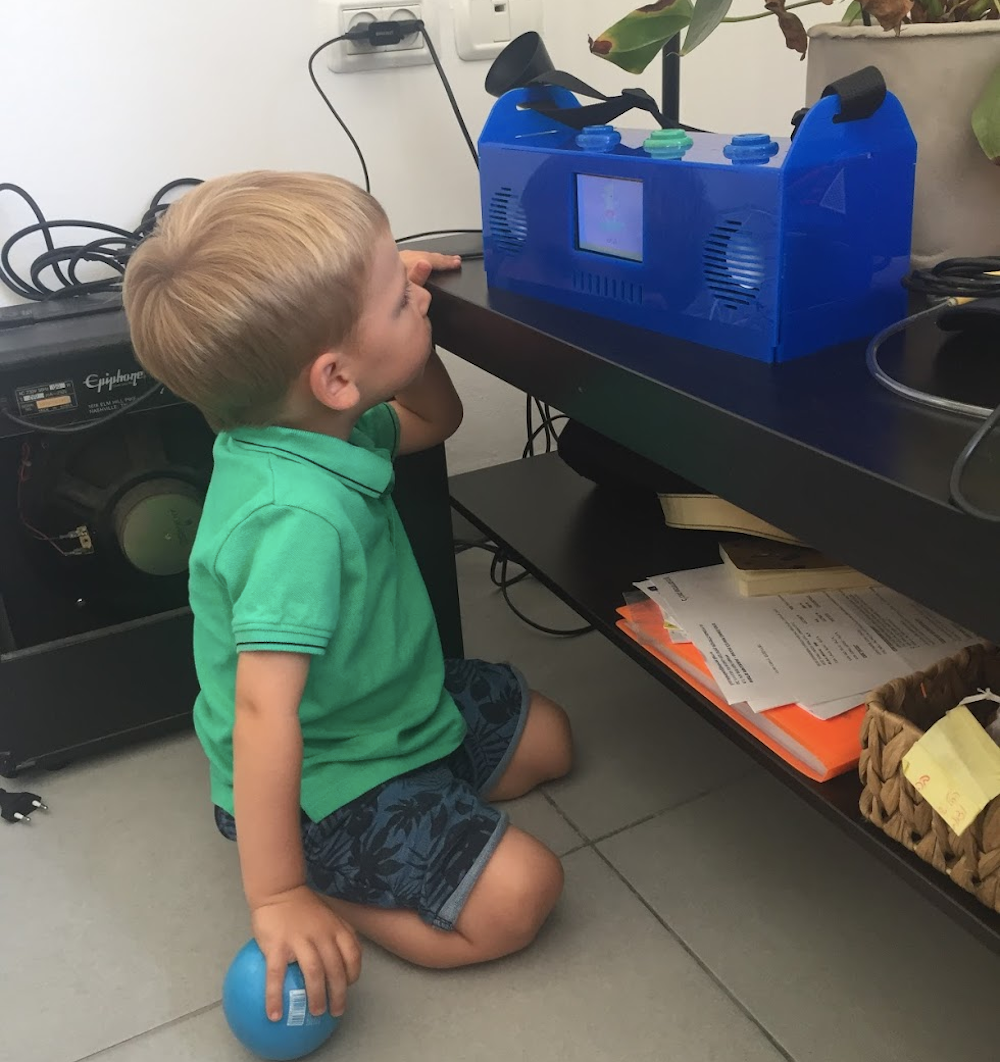 Rocking out
Aftermath - Some things I would’ve done differently:
- I should have added more tabs to the different plastic parts so the structure will be more firm, will be easier to glue together, and maybe even easier to assemble.
- Hot glue is not that good when you need to stick something accurately in place. Zip ties are a last-minute improvisation that is actually pretty good. I should have planned for them earlier by setting up the holes they would go through.
- I should have added better structural support for the in-line volume control - right now it’s held by hot glue which is, as previously mentioned, not that great.
- The supports for the speakers and raspberry work well, but it should be easier to determine which way is up when assembling them. It almost drove me crazy having to re-measure them all the time to make sure I'm not glueing them upside down. Even a small triangle would have done the job.
- On/off toggle switch - I still need to figure this out. Ideally there should be some way of starting the raspberry up remotely by USB.